Please make sure that the rotate speed of test stations is stable around 1600~2100(rpm) and the vibration reading range is not more than 10 before calibrating the I.C.
Step1: Check the armature parameters
Get into the armature parameter page. Check the following parameters.
1. Radius: the radius of the rotor.
2. Tooth number: the number of teeth .
3. Slot width: the width of slot between two nearby teeth.
4. Trail mass: the mass of magnet used to calibrate the influence coefficient.
5. Trail mass radius: 1/2 height of magnet + radius of rotor.
² If these parameters are not all right, please correct them.
Step 2: Get into the operate panel
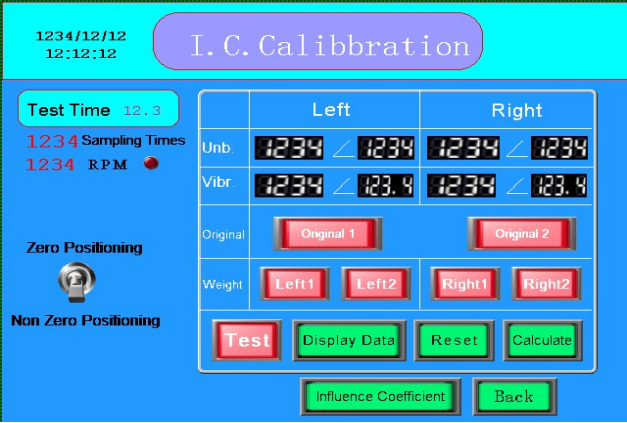
Press the button【I.C. calibration】on menu page to show the “I.C. calibration page”. See figure 2.5.2:

Figure 2.5.2 I.C. Calibration page
Step 3: Mark the calibrate rotor.
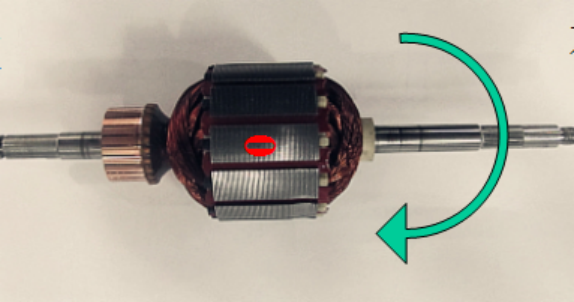
1.Take a new rotor (unbalanced, we call it calibrate rotor) and mark it as the following steps. See figure 2.5.3.
ü Mark ‘0’ on a tooth of rotor.

Figure 2.5.3 marks on the calibrate rotor
2. Put the rotor on machine with the tooth “0” upward, then press【Original 1】 button the button changed from green to red. When this test completed, rotate the rotor to make sure the tooth “0” upward, after this press【Original 2】button, test again.
3. Put the trial mass (magnet) on the left edge of tooth ‘0’, and make the tooth “0” upward, then press【Left 1】button. When this testing completed, rotate the rotor to make sure the tooth “0” upward, after this press【Left 2】button, test again.
4. Put the trial mass (magnet) on the right edge of tooth ‘0’, and make the tooth “0” upward, then press【Right 1】button. When this testing completed, rotate the rotor to make sure the tooth “0” upward, after this press【Right 2】button, test again.
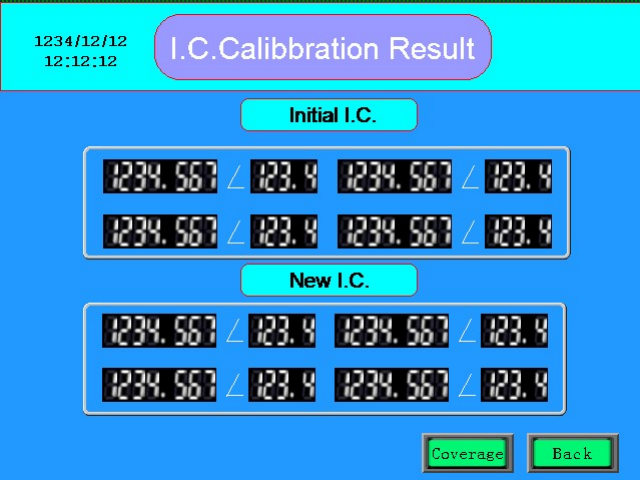
5.After all test completed, press【Calculate】button. See figure 2.5.4, then press【Coverage】button. I.C. Calibration is completed.

 JZABM Balancing Machines

